With the arrival of spring, now is an opportune moment to start planning a vegetable garden. This guide can help you get started cultivating a bountiful garden of fresh produce, whether you are a seasoned gardener or a novice.
Follow these steps closely to help you dig a garden bed that produces exceptional results this spring.
- Carefully select the location you would like to turn into a new bed. A spot that gets full sun is best. A good rule of thumb is that if you grow a plant for the fruit or the root, it needs full sun. If you grow it for the leaves, stems or buds, a little shade will be just fine.
- Always keep in mind that some sunny spots may become shaded once the trees grow leaves.
- Prepare the soil: Remove any weeds, rocks or debris from the garden bed. Till the soil to a depth of 6-8 inches and mix in compost or aged manure to improve soil fertility.
- If you have poor soil conditions or find it difficult to bend down to work in the garden, consider creating a raised bed area where you can more easily work the soil and tend to plants. Raised beds will also warm up quicker in the spring.
- When choosing a location, avoid low areas in the ground or any spot that holds water. Very few plants will tolerate “wet feet.”
- If you chose an area that is currently part of the lawn, you must first remove the sod. You can take different routes to accomplish this, but keep in mind that those that yield quick results can require considerable effort, while less labor-intensive methods may take at least a season to produce results.
The four main methods of removing sod are digging, tilling, smothering and applying herbicides.
- Digging produces quick, clean results and allows you to plant immediately. If the sod is in good condition, it can be used elsewhere in your yard. It also makes good compost. Drawbacks include significant loss of organic material, and it can be very labor intensive.
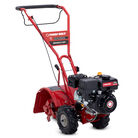
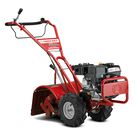
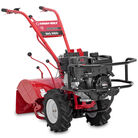
- Tilling has many benefits, providing quick, clean results that enable you to plant immediately. It allows you to retain the organic matter in the soil and is quicker and easier than digging, since the machine does most of the work. It can be difficult, however, on rocky sites or in wet and clay soils. Avoid grinding soil down to a fine powder by stopping once you have clumps of soil the size of tennis balls. Use these tilling do’s and don’ts to help you get your beds back in shape.
- Smothering is the easiest way to eliminate grass – but it can take up to several months to produce results. Simply cover the area you want with cardboard or newspaper and keep it watered down to hold in place. This will eliminate light reaching the grass. It will take several months for the grass to die back, but you can plant new grass seeds right through the paper or till them into the soil when ready. Light-blocking plastic can also be used to cover the area. When the edges are secured, the temperature underneath will increase dramatically and eventually kill the grass. You will need to remove the plastic before planting anything.
- Applying herbicides is the least recommended way to remove grass. While relatively simple, you run the risk of injuring or killing nearby plants and can potentially contaminate the area and harm beneficial organisms. Be sure to follow all label directions carefully and use only products specifically formulated for the types of plants you want to kill. See how to naturally eliminate grass and weeds without exposing yourself, pets and other yard foliage to toxic herbicides, pesticides and fungicides.
Design your garden this spring by planning its layout and determining which vegetables to grow and where to place them. Take advantage of companion planting, which involves growing crops that complement each other.
- Choose and plant seeds: Select high-quality seeds from a reliable source and sow them according to the package instructions, ensuring that they are planted at the appropriate depth and distance from each other. Learn how to plan for your next edible garden to have a fruitful season – when to start planting, which plants and soil to choose for your zone, and what space and location are best.
After planting, consider the following steps as the warm-weather season continues through summer.
- Water and nourish: Keep your garden well-watered, ensuring that the soil is consistently moist but not oversaturated. Use a balanced fertilizer every few weeks to encourage healthy growth.
- Stay vigilant: Monitor your plants regularly for signs of pests or diseases. Quickly remove any affected plants and take necessary measures to prevent further spread.
- Reap your rewards: Harvest your vegetables once they are mature, following the recommended guidelines for each type of plant. Enjoy the fresh, flavorful produce from your garden!


